Setup MTA-STS using OnDMARC
What
This guide explains how to set up MTA-STS using OnDMRAC, a managed hosted solution.
What is MTA-STS
MTA-STS stands for "Mail transfer agent Strict Transport Security" and declares to other mail servers that they accept secure TLS based messages, and if they should refuse to deliver to the domain if they are not secure.
Below is the abstract from the RFC: RFC: 8461 ⧉
SMTP MTA Strict Transport Security (MTA-STS) is a mechanism enabling mail service providers (SPs) to declare their ability to receive Transport Layer Security (TLS) secure SMTP connections and to specify whether sending SMTP servers should refuse to deliver to MX hosts that do not offer TLS with a trusted server certificate.
MTA-STS relies on SMTP TLS Reporting as defined in RFC8460 ⧉, which is covered by OnDMARC
Setup
There are several steps
If your domain is already in OnDmarc you can skip to create MTA-STS records
Add your domain
Navigate to app.redsift.cloud ⧉ and select REDSIFT OnDMARC > GO TO RED SIFT ONDMARC
On the dashboard you're greeted with, click on ADD DOMAIN ->
Type the name of your domain in.
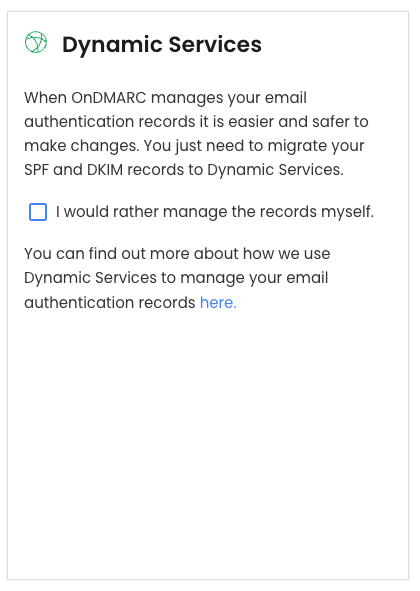
You will be asked if you wish to use Dynamic Services.
Dynamic services are hosted by OnDmarc and are the easiest way to manage mail config, as you can use their UI and they take
care of all the admin like sts-policy-max-age and sts-id ⧉
Untick the box so it looks like below
You will then be asked to add the DNS records presented to your domain.
Limitation of this guide
This guide will not go in to how to add DNS records to your domain, as this is different for each DNS provider.
One the DNS records have been added, click NEXt -> at the bottom of the page
Create MTA-STS records
When do you actually create the policy?
I had this question, and this is why I made this documentation.
After you've created the DNS records, there is no active policy. Eg: None.
Once you've then gone through the wizard to create the policy, only then does it become live and you can make adjustments.
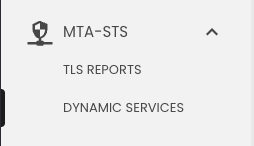
Navigate to MTA-STS on the side menu, and select DYNAMIC SERVICES
Select your domain from the Domain selector at the top
Click GENERATE RECORDS
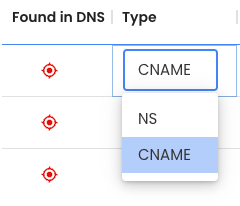
You will be presented with records, and under the TYPE column, set them to CNAME
Create the listed records in your DNS provider's control panel.
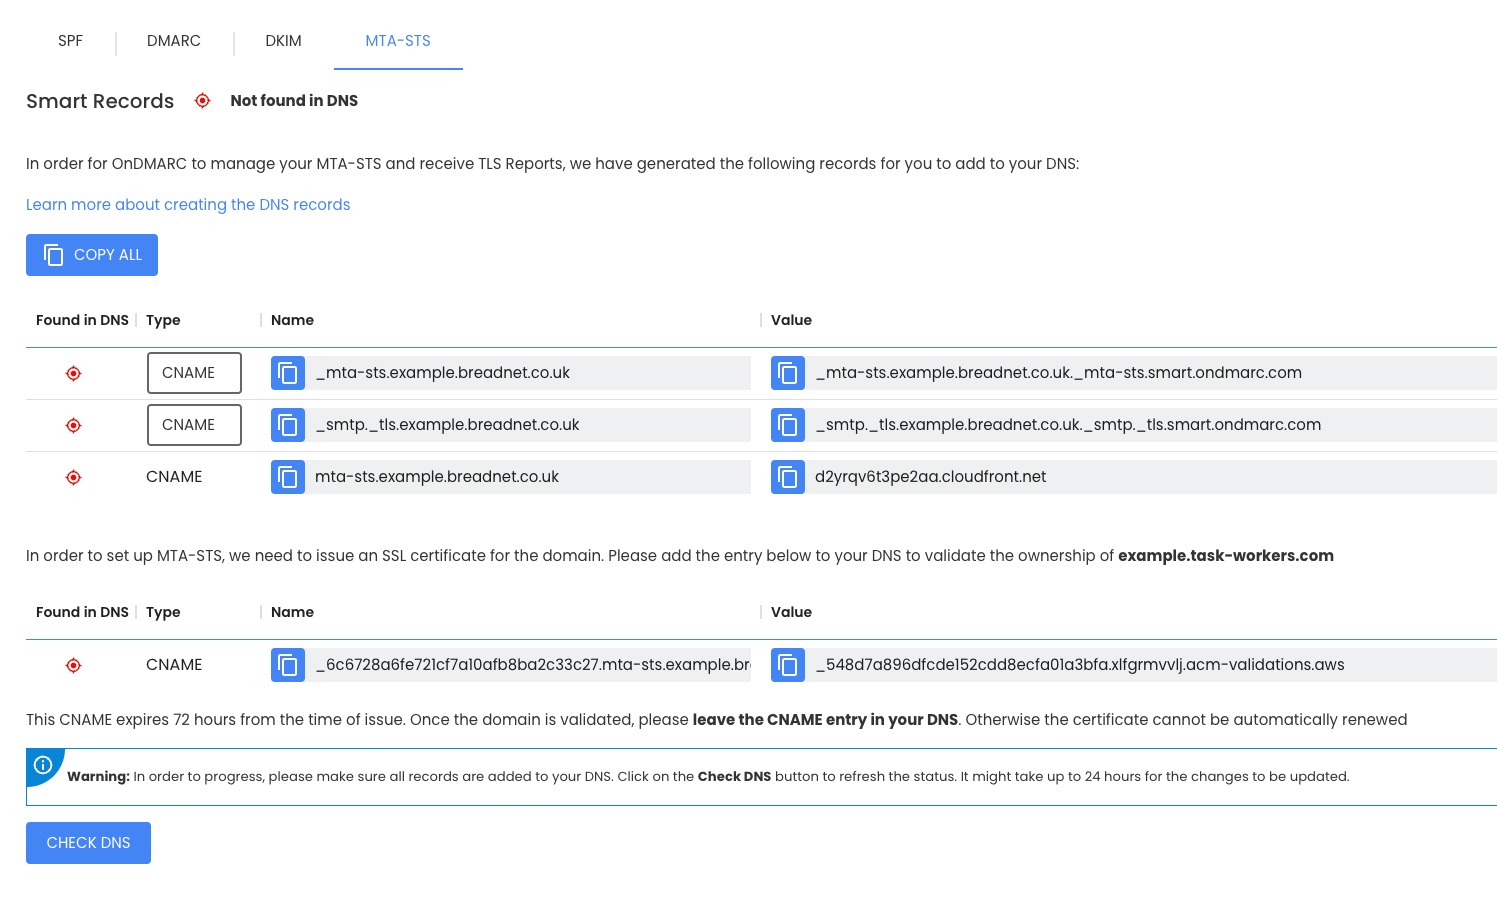
Make a sandwich or what ever it is that takes around 10 minutes, then click on CHECK DNS at the bottom of the page. It takes some time for DNS changes to come through all around the world, and 10 minutes seems like a reasonable amount of time.
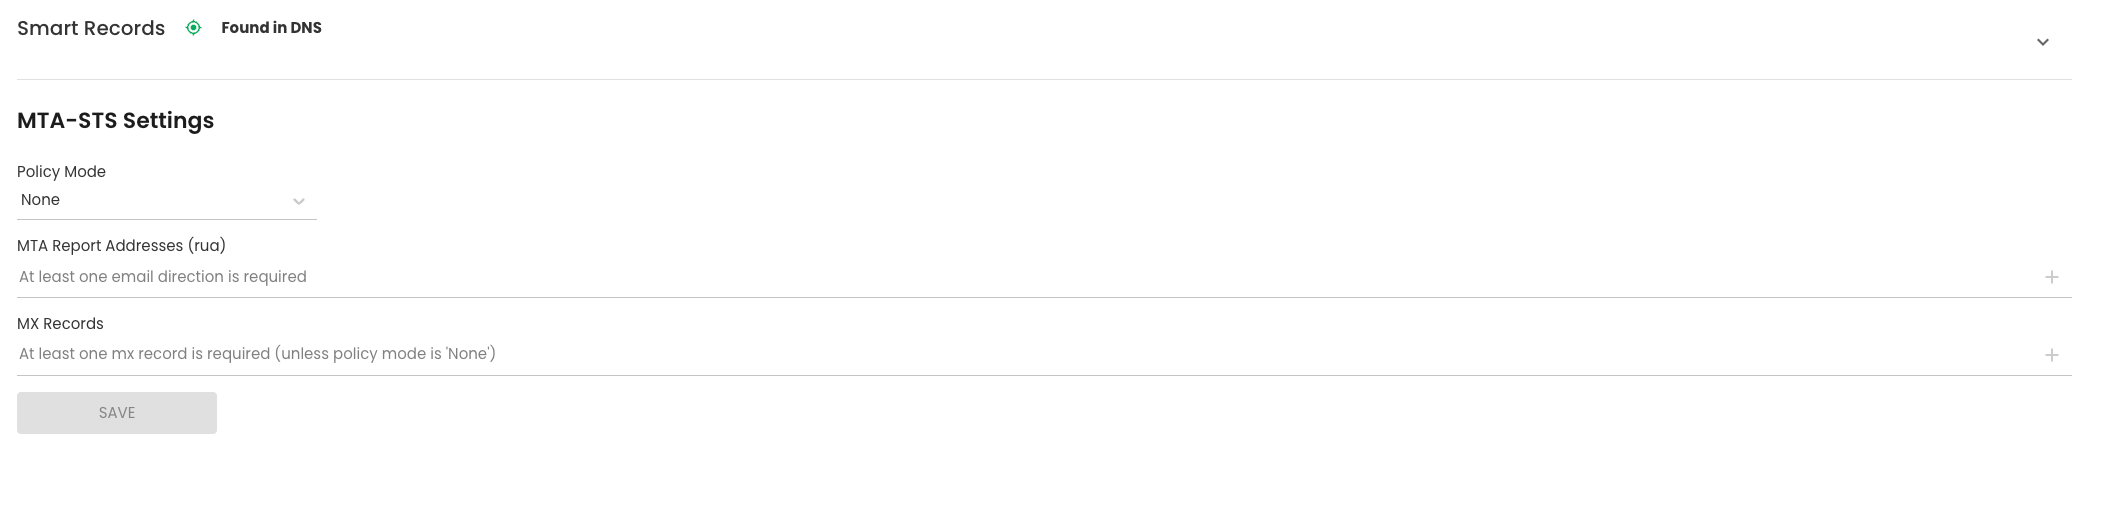
Set up the policy
You will be greeted with a page like the below. This is where we design our policy
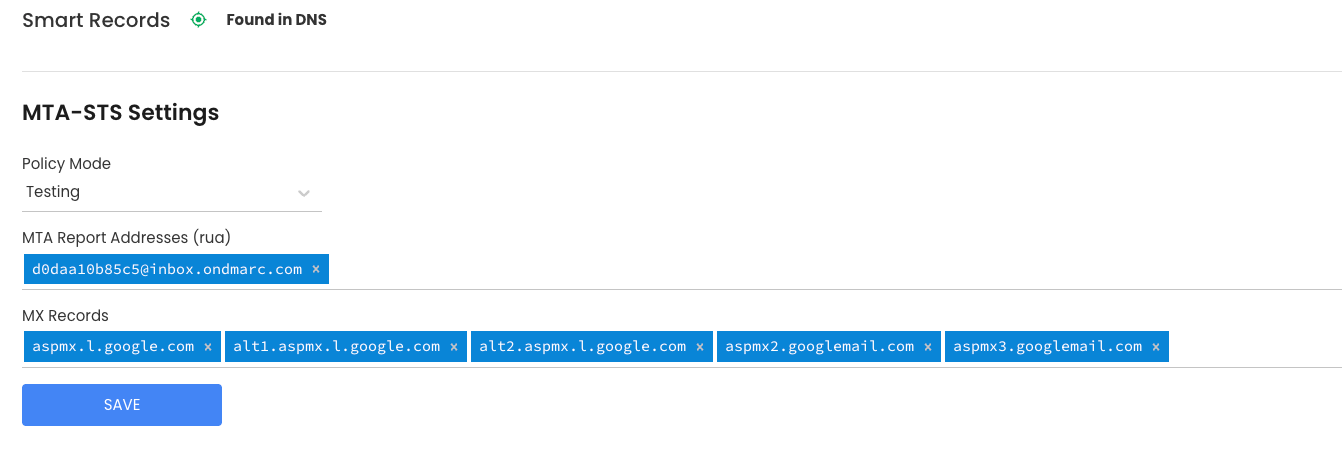
You will need the RUA/ RUF email address for your OnDMARC account, navigate to Settings > Domains and scroll down
and copy the email address you see at the bottom of the page. It will be formatted like d0daa10b85c5@inbox.ondmarc.com
| Setting name | Explanation and considerations | Value |
|---|---|---|
| Policy mode | Should the policy be in reporting only mode, or reject if emails do not comply. For the first month when you set this up, put it in testing |
enforce or testing |
| MTA Report Address | The email address that reports get sent to. | Use RUA/ RUF email from the Domains page |
| MX Records | This is the list of MX servers your emails get delivered to. I recommend running dig MX <your domain> and putting them in order of priority as they show in the MX record |
Your MX records |
An example completed policy for a domain using Google Workspace (setup before 2023 ⧉) would look like the below
MX records
Let's say our domain is example.com and we dig for MX records
We get the response:
➜ dig MX example.com

; <<>> DiG 9.10.6 <<>> MX example.com
;; global options: +cmd
;; Got answer:
;; ->>HEADER<<- opcode: QUERY, status: NOERROR, id: 48442
;; flags: qr rd ra; QUERY: 1, ANSWER: 5, AUTHORITY: 0, ADDITIONAL: 1

;; OPT PSEUDOSECTION:
; EDNS: version: 0, flags:; udp: 4096
;; QUESTION SECTION:
;example.com.                        IN      MX

;; ANSWER SECTION:
example.com.         300     IN      MX      1 aspmx.l.google.com.
example.com.         300     IN      MX      10 aspmx2.googlemail.com.
example.com.         300     IN      MX      10 aspmx3.googlemail.com.
example.com.         300     IN      MX      5 alt1.aspmx.l.google.com.
example.com.         300     IN      MX      5 alt2.aspmx.l.google.com.

;; Query time: 80 msec
;; SERVER: 127.0.2.2#53(127.0.2.2)
;; WHEN: Thu Jul 24 14:24:24 BST 2025
;; MSG SIZE  rcvd: 176
We would then put in to the MX Records field
aspmx.l.google.com alt1.aspmx.l.google.com alt2.aspmx.l.google.com aspmx2.googlemail.com aspmx3.googlemail.com
How to test this
Let's assume your domain is example.com:
You can navigate to: https://mta-sts.example.com/.well-known/mta-sts.txt ⧉ or use curl and you should see the below
version: STSv1
mode: testing
mx: aspmx.l.google.com
mx: alt1.aspmx.l.google.com
mx: alt2.aspmx.l.google.com
mx: aspmx3.googlemail.com
mx: aspmx2.googlemail.com
max_age: 86401
You can also use one of the below tools
- MX toolbox ⧉
- Mail hardener ⧉
- Easy DMARC ⧉
- UK public sector only: NCSC Mail Check ⧉
- DMARCLY ⧉
- esmtp.email ⧉
When do I get the reports
As per the RFC that MTA-STS depends on (RFC8460 ⧉) reports should be generated at [midnight each day](https://datatracker.ietf.org/doc/html/rfc8460#section-4.1 ⧉, and then sent via email to your RUA address ⧉ and then in theory a day later they will be OnDMARC's STS reports.
Next steps
Review the reports generated, remediate any issues and then set the policy from Testing to Enforce